WordPress(ワードプレス)でお問い合わせページを作成するとき、プラグインの「Contact Form 7」をインストールしてデフォルトのまま使用しているWEBサイトやブログを見ることが多いです。
デフォルトでも、必要最低限の情報を入力する内容になっていますので変更しなくてもいいと思いますが、でも、ちょっと他のサイトとは違うお問い合わせフォームを作ってみませんか?
- 必須項目の設定
- チェックボックス
- ドロップダウンメニュー
- スパム対策
などの項目を追加して、見栄えもよくなる簡単カスタマイズ方法を解説します。
Contact Form 7の設定

- 「お問い合わせ」⇒「新規追加」をクリックします。
※お問い合わせ項目がない・Contact Form 7をインストールしていないときは、「Contact Form 7のインストール方法」を参考にして下さい。
Contact Form 7のカスタマイズコード
今回は、tableタグを使用して表形式で綺麗に見た目を整えたいと思います。
一項目ずつ紹介していますので、運営するサイトのお問い合わせページに合った項目を組み合わせて使用して下さい。
氏名の入力欄

<table class=”toiawase”>
<tr>
<th>
<span class=”hissu”>必須</span><span>お名前</span>
</th>
<td>
[text* your-name class:textname placeholder”名前 太郎”]
</td>
</tr>
</table>
メールアドレスの入力欄

<table class=”toiawase”>
<tr>
<th>
<span class=”hissu”>必須</span><span>メールアドレス</span>
</th>
<td>
[email* your-email class:mailaddress placeholder”mail@example.com”]
</td>
</tr>
</table>
電話番号の入力欄

<table class=”toiawase”>
<tr>
<th>
<span class=”nini”>任意</span><span>電話番号</span>
</th>
<td>
[tel your-tel class:telnumber placeholder”090-1234-5678″]
</td>
</tr>
</table>
郵便番号の入力欄

<table class=”toiawase”>
<tr>
<th>
<span class=”hissu”>必須</span><span>郵便番号</span>
</th>
<td>
[text* your-postalcode class:postalnumber placeholder”123-4567″]
</td>
</tr>
</table>
都道府県名の入力欄

<table class=”toiawase”>
<tr>
<th>
<span class=”hissu”>必須</span><span>都道府県</span>
</th>
<td>
[text* your-prefectures class:toshimei placeholder”◯◯県”]
</td>
</tr>
</table>
住所の入力欄

<table class=”toiawase”>
<tr>
<th>
<span class=”hissu”>必須</span><span>ご住所</span>
</th>
<td>
[text* your-address class:p-locality placeholder”○○市○○1-2-3 ○○マンション 101号室”]
</td>
</tr>
</table>
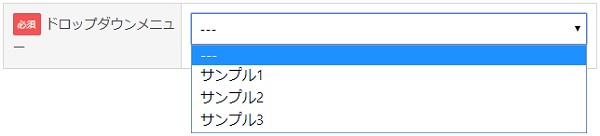
ドロップダウンメニューの設置
<table class=”toiawase”>
<tr>
<th>
<span class=”hissu”>必須</span><span>ドロップダウンメニュー</span>
</th>
<td>
[select* dpmenu include_blank class:drop “サンプル1” “サンプル2” “サンプル3”]
</td>
</tr>
</table>
チェックボックス横並び(1つ選択)の設置

<table class=”toiawase”>
<tr>
<th>
<span class=”nini”>任意</span><span>チェックボックス横並び【1つを選択】</span>
</th>
<td>
[checkbox checkbox-1 exclusive use_label_element default:1 class:checkyoko1 “サンプル1” “サンプル2” “サンプル3”]
</td>
</tr>
</table>
チェックボックス横並び(複数選択)の設置

<table class=”toiawase”>
<tr>
<th>
<span class=”hissu”>必須</span><span>チェックボックス横並び【複数選択】</span>
</th>
<td>
[checkbox* checkbox-2 use_label_element default:1 class:checkyoko2 “サンプル1” “サンプル2” “サンプル3”]
</td>
</tr>
</table>
チェックボックス縦並び(1つ選択)の設置

<table class=”toiawase”>
<tr>
<th>
<span class=”nini”>任意</span><span>チェックボックス縦並び【1つ選択】</span>
</th>
<td>
[checkbox checkbox-3 exclusive use_label_element default:1 class:tatelist class:checktate1 “サンプル1” “サンプル2” “サンプル3”]
</td>
</tr>
</table>
チェックボックス縦並び(複数選択)の設置

<table class=”toiawase”>
<tr>
<th>
<span class=”hissu”>必須</span><span>チェックボックス縦並び【複数を選択】</span>
</th>
<td>
[checkbox* checkbox-4 use_label_element default:1 class:tatelist class:checktate2 “サンプル1” “サンプル2” “サンプル3”]
</td>
</tr>
</table>
ラジオボタン横並びの設置

<table class=”toiawase”>
<tr>
<th>
<span class=”nini”>任意</span><span>ラジオボタン横並び</span>
</th>
<td>
[radio radio-1 use_label_element default:1 class:radio1 “サンプル1” “サンプル2” “サンプル3”]
</td>
</tr>
</table>
ラジオボタン縦並びの設置

<table class=”toiawase”>
<tr>
<th>
<span class=”hissu”>必須</span><span>ラジオボタン縦並び</span>
</th>
<td>
[radio radio-2 use_label_element default:1 class:tatelist class:radio2 “サンプル1” “サンプル2” “サンプル3”]
</td>
</tr>
</table>
日付入力欄の設置

<table class=”toiawase”>
<tr>
<th>
<span class=”hissu”>必須</span><span>日付</span>
</th>
<td>
[date* date-1 placeholder class:datesp ]
</td>
</tr>
</table>
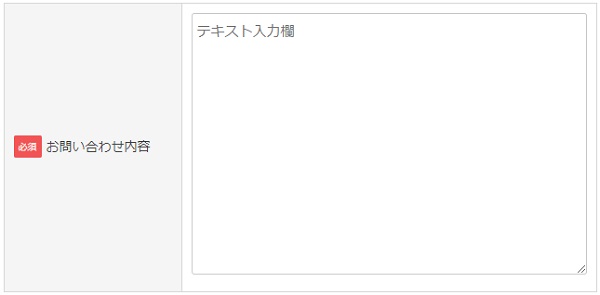
お問い合わせ内容の入力欄
<table class=”toiawase”>
<tr>
<th>
<span class=”hissu”>必須</span><span>お問い合わせ内容</span>
</th>
<td>
[textarea* your-message class:content placeholder “テキスト入力欄”]
</td>
</tr>
</table>
スパム対策の設置

[acceptance acceptance-1 class:spam1]スパムメール防止のため、こちらのボックスにチェックを入れてから送信してください。
送信ボタンの設置
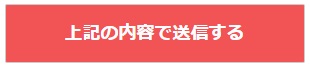
[submit id:formbtn “上記の内容で送信する”]
必須と任意の設定方法
必須を消したいときは「<span class=”hissu”>必須</span>」の部分を削除します。
任意を消したいときは「<span class=”nini”>任意</span>」の部分を削除します。
必須項目を任意項目に変更したいときは「<span class=”hissu”>必須</span>」を削除して、「<span class=”nini”>任意</span>」を貼り付けます。
任意項目を必須項目に変更したいときは「<span class=”nini”>任意</span>」を削除して、「<span class=”hissu”>必須</span>」を貼り付けます。

[ ]内の冒頭部分の単語のあとに「*(アスタリスク)」があるのが必須項目になりますので、必須項目には「*」を付けて、任意項目は「*」を消します。
ステップ1は、見た目の文字の修正で、ステップ2はシステム上、必須項目に入力されていないと送信されないように設定する項目です。
お問い合わせフォームのカスタマイズ例
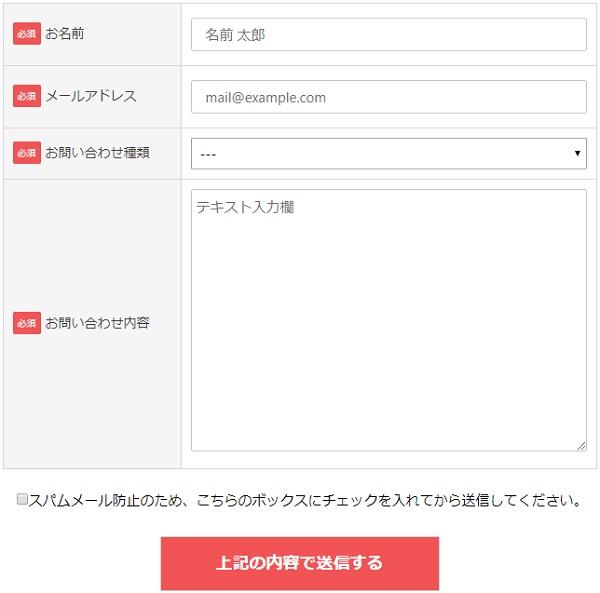
名前・メールアドレス・お問い合わせ種類(ドロップダウンメニュー)・お問い合わせ内容・スパム対策・送信ボタンを組み合わせて作成したお問い合わせページです。
当サイトのカスタマイズ結果は「お問い合わせページ」をご覧ください。
<table class=”toiawase”>
<tr>
<th>
<span class=”hissu”>必須</span><span>お名前</span>
</th>
<td>
[text* your-name class:textname placeholder”名前 太郎”]
</td>
</tr>
<tr>
<th>
<span class=”hissu”>必須</span><span>メールアドレス</span>
</th>
<td>
[email* your-email class:mailaddress placeholder”mail@example.com”]
</td>
</tr>
<tr>
<th>
<span class=”hissu”>必須</span><span>お問い合わせ種類</span>
</th>
<td>
[select* dpmenu include_blank class:drop “お問い合わせ” “コンサル依頼” “ライティング依頼”]
</td>
</tr>
<tr>
<th>
<span class=”hissu”>必須</span><span>お問い合わせ内容</span>
</th>
<td>
[textarea* your-message class:content placeholder “テキスト入力欄”]
</td>
</tr>
</table>
[acceptance acceptance-1 class:spam1]スパムメール防止のため、こちらのボックスにチェックを入れてから送信してください。
[submit id:formbtn “上記の内容で送信する”]
お問い合わせフォームのカスタマイズ方法
フォームタブ
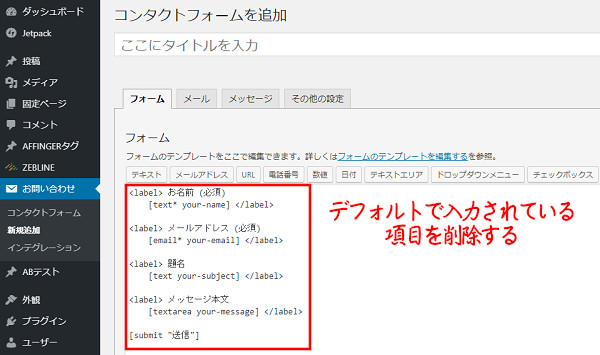
コンタクトフォームにデフォルトで入力されている項目を削除します。
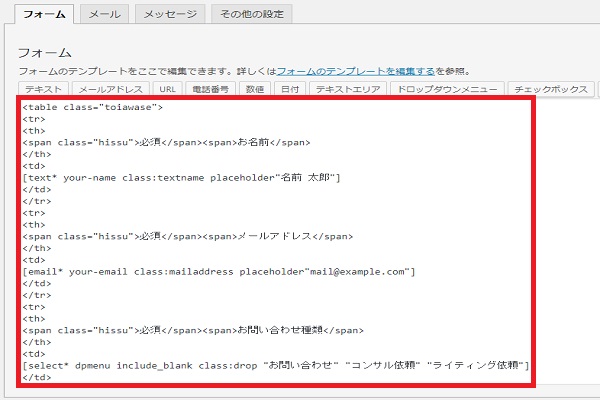
tableタグを使用して上記カスタマイズコードを組み合わせて、フォームに入力します。
<table class=”toiawase”>
ここに<tr>~</tr>を貼り付ける
</table>
メールタブ
今回のカスタマイズを行なうと、「題名」の入力がなく「ドロップダウンメニュー」で選ぶ形式になります。
お問い合わせページから来たメールの依頼内容が題名(メールの件名)では分からない状態になってしまうので解決します。
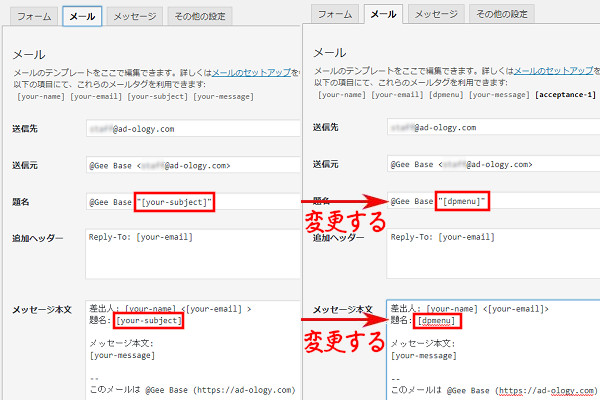
- 題名欄の[your-subject]を[dpmenu]に変更します。
- メッセージ本文欄の題名の[your-subject]を[dpmenu]に変更します。
Contact Form 7のCSSコードを追加
追加するCSSコードをコピーする
/*Contact Form 7カスタマイズ(スマホ対応)*/
@media(max-width:500px){
.toiawase th,.toiawase td {
display:block!important;
width:100%!important;
border-top:none!important;
-webkit-box-sizing:border-box!important;
-moz-box-sizing:border-box!important;
box-sizing:border-box!important;
}
.toiawase tr:first-child th{
border-top:1px solid #d7d7d7!important;
}
/* 必須・任意のサイズ調整 */
.toiawase .hissu,.toiawase .nini {
font-size:10px;
}}
/*見出し欄*/
.toiawase th{
text-align:left;
font-size:14px;
color:#444;
padding-right:5px;
width:30%;
background:#f5f5f5;
border:solid 1px #d7d7d7;
}
/*入力欄*/
.toiawase td{
font-size:13px;
border:solid 1px #d7d7d7;
}
/*テーブル全体*/
.entry-content .toiawase tr,.entry-content table{
border:solid 1px #d7d7d7;
}
/*必須の表示*/
.hissu{
font-size:7px;
padding:5px;
background:#F15454;
color:#fff;
border-radius:2px;
margin-right:5px;
position:relative;
bottom:1px;
}
/*任意の表示*/
.nini{
font-size:7px;
padding:5px;
background:#99BBFF;
color:#fff;
border-radius:2px;
margin-right:5px;
position:relative;
bottom:1px;
}
/*ラジオボタンを縦並び指定*/
.tatelist .wpcf7-list-item{
display:block;
}
/*送信ボタンのデザイン変更*/
#formbtn{
display: block;
padding:15px;
width:300px;
background:#F15454;
color:#fff;
font-size:18px;
font-weight:bold;
border-radius:2px;
margin:25px auto 0;
}
/*送信ボタンマウスホバー時*/
#formbtn:hover{
background:#fff;
color:#F15454;
border:2px solid #F15454;
}
追加CSSコードに貼り付ける
上記でコピーしたCSSコードを貼り付ける場所をお伝えします。
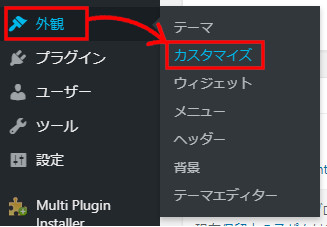
- 「外観」⇒「カスタマイズ」をクリックします。
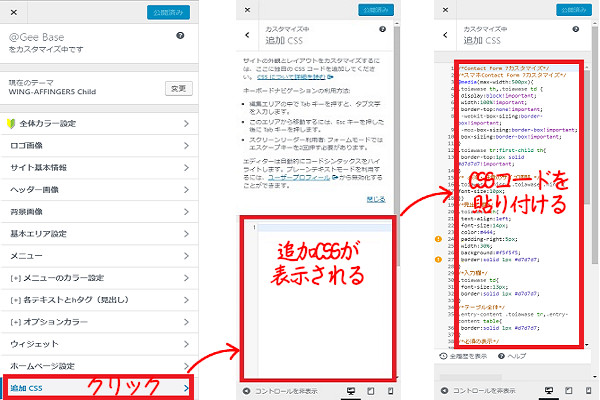
- 「追加CSS」をクリックします。
- すると、追加CSSが表示されます。
- 追加CSSにCSSコードを貼り付けます。
まとめ
お問い合わせページは、見た目を変えるだけで印象がガラッと変わります。サイトのイメージカラーに統一するとより洗練されたイメージになります。
簡単にできるお問い合わせページのカスタマイズです。


コメント